Quantcast
Channel: Recipes – Artisan Bread in Five Minutes a Day

Chili Bread Bowl for the Super Bowl

$
0
0

I have to admit that I watch football once a year. The Super Bowl is my kind of game; more about food and music, than actual football. Although I do regret missing the Vikings big game this weekend. Everyone gets excited about a good ending. Fingers crossed we will not only be hosting the Super Bowl in MN, but our team will also play a starring role. I know some of you will be disappointed in my laissez faire attitude, but I really do take the food for this game seriously, so it makes me oddly qualified to write this post. Among other things I’m making chili in my crock pot, baking crusty rolls and creating these super tasty chili bread bowls.

Chili Bread Bowl:

1 batch chili ( I used one from Skinnytaste Fast and Slow by Gina Homolka)

Your favorite toppings: cheese, avocado, onion, salsa, etc.

2 pounds Master Recipe from any of our books:

The New Artisan Bread in Five Minutes a Day or
The New Healthy Bread in Five Minutes a Day or
Gluten-Free Artisan Bread in Five Minutes a Day

Divide the dough into 6 equal pieces and bake as directed here. (You’ll allow them to rest for 45 minutes and bake for about 20 minutes or until golden-brown.)

Allow the rolls to cool, then cut off the top and hollow out the middle. Don’t cut out too much of the interior or the chili may soak right through the bread. Save the scraps to make croutons or a savory bread pudding.

Place the hollowed out rolls on a baking sheet.

Stuff them full of chili.

Top with cheese

and bake until it melts.

Top with your favorite chili condiments. Go TEAM!!!!


Fresh Tomato Pizza

$
0
0

Tomato Pizza | Breadin5 photo by Zoë François

Labor day is a turning point; when we switch our thinking from picnics to packed school lunches. But, it is also the time when the summer fruits are busting out their last hurrah and the tomatoes are in their peak glory. This pizza is an ode to my dad’s garden and the bounty of tomatoes and squash that he grew. He is a magnificent gardener and this pizza needed nothing more than olive oil, a dash of salt and fresh herbs to be magnificent. I threw on a bit of mozzarella to satisfy the children.

I made the pizza dough from Artisan Pizza and Flatbread in Five Minutes a Day, using bread flour from a local miller, Bakersfield Flour and Bread, but you can use all-purpose or bread flour that you have on hand. It is fun to experiment with all kinds of flours and pizza dough is just the place, since it is so forgiving. You can watch me toss this dough in the air (there is a cameo appearance by my poodle, Miles) in our @breadin5 Instagram video.

tomato pizza | Breadin5 photo by Zoë Francois

Tomato Pizza

8 ounces pizza dough from any of our books

1/3 cup pesto

4-6 fresh tomatoes, depending on the size

Squash blossoms, if you have them

Drizzle of olive oil

Sprinkle of salt

Fresh herbs

2 ounces mozzarella cheese (optional)

Preheat oven with Pizza Stone or Baking Steel to 550°F or as hot as it will go.

Roll and toss the dough into a 12-inch disk and place it on a Pizza Peel dusted with cornmeal.

Top the dough with the pesto, tomatoes, squash blossoms, cheese, salt, oil, and herbs.

Slide the pizza onto preheated stone and bake until crust is caramelized and crisp.

Cool for a couple of minutes before slicing.

White Bread Master Recipe from Holiday and Celebration Bread in Five

$
0
0

There are about one hundred recipes in all of our books, but we always start with a Master Recipe. It is our opportunity in each book to dive a little deeper into our super fast and simple method of bread baking. In Holiday and Celebration Bread in Five Minutes a Day we started with a simple and nostalgic white bread. It can be the perfect school sandwich bread or the base of some pretty fancy holiday breads. If white bread is not your cup of tea (or loaf of bread) then try one of our enriched or whole grain breads from the new book. With dozens of doughs to choose from in the book, you will find many that suit your holiday needs.

If you are familiar with our dough and method, you may notice that the doughs in this new book are a bit drier than our previous ones. This is on purpose, since some of the more intricate loaves in this book would be more difficult to shape with a very wet dough. Since many of the doughs in the book are enriched (with butter, eggs, milk, etc) they only store in the refrigerator for about 5 days (you can freeze what is left). Because the dough is drier, we find it much easier to mix with a stand mixer, as opposed to a wooden spoon or even a Danish Dough Whisk. You can use those tools, but you’ll need to put some muscle into it, so the dough comes out nice and smooth and consistent.

This post is meant to provide a guide to baking the bread, but the book has tons more details and lots of tips and techniques for those who are just starting out with bread baking or our method in particular. 

White Bread Master Recipe

from Holiday and Celebration Bread in Five Minutes a Day

We give all of the recipes in cup and weight measures. Weighing the ingredients is always preferred, because it is most accurate, consistent and is the easiest.

3 cups (680g) Lukewarm water (about 100°F) – hotter and it may kill the yeast. Cooler water may take longer to activate the yeast, which can slow down the rise significantly, especially in some of the doughs that use eggs.

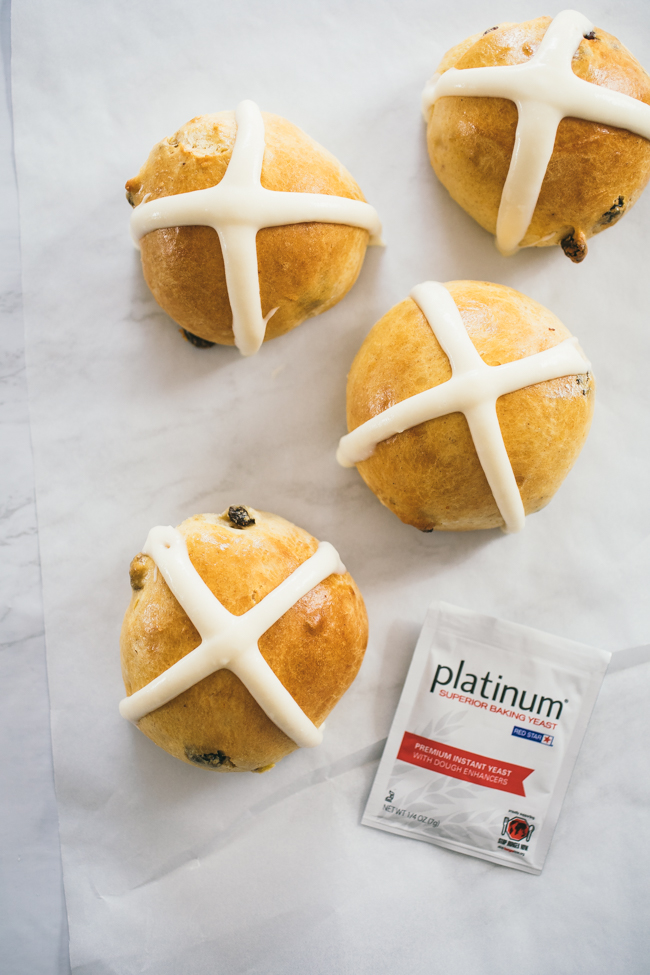
1 tablespoon (10g) Granulated Yeast (any type will do, active, rapid rise, quick, bread machine…)

1 tablespoon (17g) kosher salt (if you use table salt, you need to decrease the amount)

1/3 cup (85g) sugar (you can use honey or other sweetener) if you want a sweeter bread or one with no sugar, there are lots of those in the book too, this is midely sweet.

1/4 cup (58g) oil (this adds a bit of tenderness to the dough, but is only lightly enriched. Many of the doughs in the book use butter, eggs and dairy for a richer and decadent taste and feel)

7 1/2 cups (1065g) all-purpose flour If you don’t have a scale you will want to use the Scoop and Sweep method of measuring in your cups.

Egg wash for brushing the top of the loaf

To mix the dough:

  1. Mix the yeast, salt, sugar and oil with the water in a 5-quart stand mixer with the paddle attachment (or in a lidded (not airtight) food container with a wooden spoon or danish dough whisk).
  2. Mix in the flour. We found the best results with the stand mixer, but if that is not available to you, be sure you get all of the ingredients very well incorporated and get right to the bottom of the bucket.
  3. Cover (not airtight), and allow to sit at room temperature for about two hours.
  4. This dough can be used as soon as it has risen for the two hours.  The dough can be stored in the refrigerator for up to 7 days. After that you can freeze the dough.

Note for Egg Enriched doughs in the book: This dough doesn’t have eggs, but many of them do, so use room temperature eggs or it can slow down the rise of your dough significantly. 

To bake the loaf:

Here we baked a super tall loaf in a pullman pan (without the top).

There are so many things you can bake with this dough in our new book, like this fanciful Holiday Star Bread, but it also makes an excellent sandwich loaf. This one is made with 3 pounds of dough that is divided into three sections. You can also bake it as a standard two pound loaf with a smooth top.

Start by weighing a 3-pound piece of dough (extra large cantaloupe-size) on a Scale. Divide the dough into three equal pieces and shape them into balls.

Place the three balls next to each other in a well greased non-stick Pullman Loaf Pan (9 x 4-Inch) (or 9×5 regular Loaf Pan), covered loosely with plastic wrap for 2 hours (or just 60 minutes if you are using fresh, unrefrigerated dough).

Preheat the oven to 350°F.

Brush the top of the dough with Egg wash (we provide many options depending on the darkness you like on your bread. Egg white is the lightest, but shiny, yolk is the darkest and the whole egg is right in the middle. Just mix any of them with a teaspoon of water and brush on the loaf.

Bake for about 60 minutes, remove from the pan and bake for an additional 10-15 minutes. This timing may vary slightly if you change up the kind of dough or the shape of the pan.

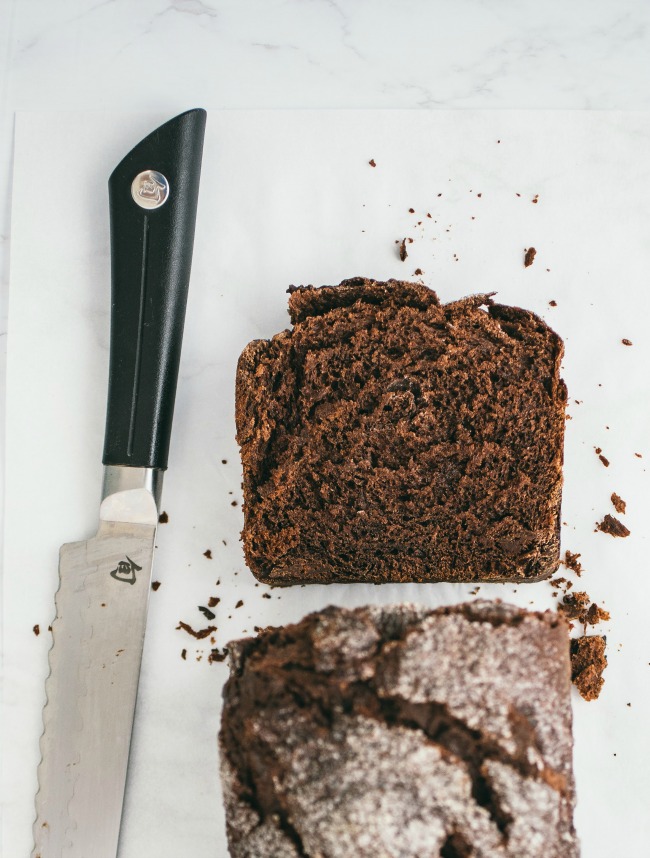
Allow the loaf to cool on a rack until room temperature. Cutting into warm bread may result in a gummy interior.

Enjoy!!

Chocolate Chestnut Bread with Red Star Yeast

$
0
0

Chestnuts roasting on an open fire is such an iconic image of Christmas. If you’ve never had roasted chestnuts, they are one of the sweetest and creamiest of nuts and the absolute perfect pairing with chocolate. This elegant bread is from our new Holiday and Celebration Bread in Five Minutes a Day book and is super easy to make. If you have a tall panettone mold, it makes a really festive loaf for the holidays or a great gift, along with our newest book. You can also bake this in a loaf pan or even muffin cups.

I also used this loaf to make a wonderful bread pudding (recipe link at the end). Watch our video on instagram of how we made the bread and tips for kneading ingredients into dough you have stored in the refrigerator.

2 pounds – from a batch of Brioche dough made with Platinum Yeast from Red Star

1 cup chopped Roasted and Peeled Chestnuts

1 cup finely chopped chocolate

Egg yolk wash (1 yolk mixed with 1 tablespoon water)

Mix the dough in a 6-Quart Round Food-Storage Container with Lid with a Danish Dough Whisk or with a Stand Mixer, as directed in the recipe. You can certainly use any of our enriched doughs, from any of our books.

A single batch of dough will make about 2 large loaves.

Once the dough has rested on the counter for 2 hours, refrigerate it until it is thoroughly chilled.

Pull out a 2 pound piece of dough, roll it out to a 1/4-inch rectangle, distribute the chestnuts and chocolate and then knead until thoroughly combined.

Form the dough into a ball and place in a well buttered 6-inch Panettone Pan . If you are using a Paper Mold, you will want to make sure it is tall enough or use a wider one.

Let the dough rise for 90 minutes.

Preheat the oven to 350°F with the rack in the middle of the oven.

Bake for about 60 minutes or until caramel colored and set when tapped on the top.

Allow the loaf to cool for about 20 minutes in the pan, then remove and cool completely on a cooling rack.

Enjoy and Happy Holidays!

To make any of the leftovers into bread pudding, you’ll find the recipe on Zoë’s website.

Raspberry Brioche Braid

$
0
0

Raspberry Brioche Braid | Artisan Bread in Five Minutes a Day

When my boys were little I took them berry picking. The concept was a good one and in my head it would be like a scene from Kinfolk. The boys sitting quietly by the raspberry bushes, adorably tossing berries into a gingham lined basket.

Watch Zoë Make a Cannoli inspired version of the Braid on the Hallmark Channel Home & Family Show! 

The reality was more Lord of the Flies meets Blueberries for Sal (which is my all-time favorite children’s book). The boys would never sit still in a setting as inviting as this for running and wielding sticks, in-which to sword fight. Nor were they likely to toss a single berry into the basket, when they could just as easily eat them. So, I picked berries, while keeping an eye out to make sure my children were not impaling each other and were accounted for. I got enough berries to bake with, but they were not-so-ceremoniously consumed in the back seat of the car, by the aforementioned sword fighters, on the way home. It was an absolutely charmed day in its way, but not if your goal was to bake something tasty. We stopped at the store and bought perfect raspberries, I baked a lovely raspberry brioche braid, that ended up in ABin5 and I have not gone berry picking (with the intention of bringing home berries) since … true story!

This raspberry brioche braid is ideal for breakfast, brunch, after school snack or makes a sweet gift for your neighbor who just had an adorable baby (as mine recently did). When you have a bucket of brioche in the refrigerator this brioche braid can be put together in a no time. First, I used the berries to make a quick jam, which is so simple and delicious and I recommend making extra to just have around. The red of these berries makes for a ruby colored jam and the flavor is just pure raspberry, no additives or binders. The jam is spread over a layer of rich cream cheese filling and then the dough is folded over the fillings in a pattern that looks fancy, but is incredibly easy to do. The finishing touches are a fresh raspberry glaze and sweet whole berries. It will impress everyone and they’ll assume you spent so much time preparing it. They never need to know how easy it is, until you share this recipe with them.

Raspberry Brioche Braid

1 pound brioche dough (I’ve used the brioche dough from The New Artisan Bread in Five Minutes a Day, and the Amish Milk Dough from Holiday and Celebration Bread in Five Minutes a Day, but you could also use Challah dough or one of the enriched doughs from our The New Healthy Bread in Five Minutes a Day book or even Gluten-Free Artisan Bread in Five Minutes a Day)

Quick Raspberry Jam

12 ounces raspberries

1/3 cup sugar

1 teaspoon lemon juice

Cream Cheese Filling

4 ounces cream cheese

1/2 teaspoon lemon zest

1 tablespoon sugar

Egg wash (1 egg mixed with 1 tablespoon water) for topping braid

Raspberry Icing

1/2 cup powdered sugar

1 raspberry

2 tablespoons heavy cream (maybe more to reach proper consistency)

6 ounces raspberries for garnish

To make the jam:

Driscoll's Raspberries

Macerated Raspberries

Place the raspberries, sugar and lemon juice into a pan and use a fork to break up the raspberries just enough to produce a bit of juice. Simmer over a medium/low heat for about 30 minutes, stirring often.

Homemade Raspberry Jam

The jam will cling to the spoon when it is done. Allow to cool before filling the braid.

Cream Cheese Filling

To make the cream cheese filling, mix the cream cheese, zest and sugar in a bowl until smooth.

Brioche Dough on a Kitchen Scale | Artisan Bread in Five Minutes a Day

Take a one pound piece of dough, weighing on a Scale is the easiest way, but if you don’t have one, a grapefruit-sized piece will do.

Brioche Dough with Cream Cheese Filling | Artisan Bread in Five Minutes a Day

Roll a 1-pound piece of dough into a 10 x 12-inch rectangle. Make sure to use enough flour that the dough doesn’t stick to the surface or the rolling pin. TRANSFER THE ROLLED OUT DOUGH TO A SHEET OF PARCHMENT (I didn’t do that, because it was easier to photograph on the counter, but building the braid on the parchment will make your life much easier). Spread the cream cheese filling down the center of the dough, not more than 1 1/2 inches wide.

Brioche Dough with Cream Cheese Filling and Raspberry Jam

Top the cream cheese with about 3/4 cup of the raspberry jam. You can add more, but some may leak out of the braid as it is baking. There may be a little jam left over to serve with the baked braid.

Cut 1/2-inch thick strips of dough with a pastry or pizza cutter. Try to get an even amount on both sides, but it’s okay if it doesn’t happen.

Brioche Dough with Cream Cheese Filling and Raspberry Jam

Lightly twist the top two strips of dough….

Brioche Dough with Cream Cheese Filling and Raspberry Jam

Then cross them over the top of the filling. Do not pull the dough too thin or it may break as it rises and bakes.

Continue that same routine of twisting the pieces and crossing them over each other on top of the filling, until you are at the bottom. If you find an odd piece of the dough, that doesn’t have a mate, just twist it and place it over the filling. That happened to me here and I bet you have a hard time telling!

Raspberry Brioche Braid | Artisan Bread in Five Minutes a Day

When you get to the end, just tuck the loose ends under the loaf, so they are secure and won’t pop out when baking.

Raspberry Brioche Braid Before Going in the Oven | Artisan Bread in Five Minutes a Day

Place the braid and parchment onto a baking sheet, cover loosely with plastic and allow to rest for about 1 1/2 hours.

Preheat the oven to 350°F

Just before baking, brush the loaf gently with the egg wash.

Bake the loaf for about 30 minutes or until golden brown.

Baked Raspberry and Cream Cheese Brioche Braid | Artisan Bread in Five Minutes a Day

Allow to cool before topping with the icing.

Powdered Sugar and Raspberry Icing

To make the icing: mix the powdered sugar, raspberry and cream together in a small bowl.

Raspberry Powdered Sugar Icing

If it is too thick to drizzle, add more cream.

Raspberry Powdered Sugar Icing

It should come off a spoon in a thin ribbon.

Raspberry Cream Cheese Brioche Braid with Powdered Sugar Drizzle

Once the braid is cool, drizzle with half the icing.

Raspberry Cream Cheese Brioche Braid with Powdered Sugar Drizzle

Top brioche braid with raspberries, drizzle with the remaining icing and serve.

Slice of Raspberry Cream Cheese Brioche Braid with Powdered Sugar Drizzle

Enjoy!

The post Raspberry Brioche Braid appeared first on Artisan Bread in Five Minutes a Day.

Chocolate Chip Cookies from The Vanilla Bean Baking Book

$
0
0

chocolate-chip-cookies-the-vanilla-bean-baking-book3-of-7

These cookies were just featured in the New York Times! We’re so thrilled for Sarah and it just confirms what we already know about them, they are AWESOME!

You are on the right site, we are just taking a short break from baking bread to bring you one of our absolute favorite recipes from Sarah’s new book, The Vanilla Bean Baking Book. You all know Sarah’s gorgeous work here on Breadin5, but you may not be as familiar with her baking website. Sarah has been working with us on the Breadin5 website and has been instrumental in our cookbook photoshoots as a food stylist. During our last marathon photo session she brought us cakes, cookies, scones and even pie she was testing for her own cookbook. When she brought in these chocolate chip cookies we took a moment out of the shoot to declare them the best cookies any of us had ever had. I do not say that lightly, considering I had a cookie company in college, have baked no fewer than 500 chocolate chip cookie recipes and have consumed even more. These are the best and now you have the recipe.

We are thrilled for Sarah and are so proud of her and this brilliant book! She and her publisher have graciously offered a copy of her book to a lucky winner of our GIVEAWAY. Just leave a note in our comments and we will select someone at random. It will make a great addition to your cookbooks or a lovely gift for someone on your list. All our normal contest rules apply. This contest is over.

chocolate-chip-cookies-the-vanilla-bean-baking-book1-of-7

CHOCOLATE CHIP COOKIES from The Vanilla Bean Baking Book

makes 10 cookies

2 cups (284 g) all-purpose flour

½ teaspoon baking soda

¾ teaspoon salt

½ pound (2 sticks; 227 g) unsalted butter, room temperature

1½ cups (297 g) granulated sugar

¼ cup (50 g) packed brown sugar

1 large egg

1½ teaspoons pure vanilla extract

2 tablespoons water

6 ounces (170 g) bittersweet chocolate, chopped into bite-size pieces averaging ½ inch with some smaller and some larger

To bake the cookies:

Adjust an oven rack to the middle position. Preheat the oven to 350°F. Line 3 Baking Sheets with aluminum foil, dull side up. (I used parchment paper, because I was desperate to make these and was out of foil. I found the results were excellent, but I would suggest doing it on foil, as Sarah suggests.) This helps create the crinkles in the cookies.

In a small bowl, whisk the flour, baking soda, and salt.

In the bowl of a stand mixer fitted with a Beater Blade, beat the butter on medium until creamy. Add the granulated and brown sugars and beat on medium until light and fluffy, 2 to 3 minutes. Add the egg, vanilla, and water and mix on low to combine. Add the flour mixture and mix on low until combined. Add the chocolate and mix on low into the batter.

chocolate-chip-cookies-the-vanilla-bean-baking-book7-of-7

Scoop the dough into 3½-ounce (100g) balls (a heaping ⅓ cup each). Place 4 balls an equal distance apart on a prepared pan and transfer to the freezer for 15 minutes before baking. After you put the first baking sheet in the oven, put the second one in the freezer.

chocolate-chip-cookies-the-vanilla-bean-baking-book6-of-7

This step is essential for getting the crinkles on the edge.

Place the chilled baking sheet in the oven and bake 10 minutes, until the cookies are puffed slightly in the center. Lift the side of the baking sheet up about 4 inches and gently let it drop down against the oven rack, so the edges of the cookies set and the inside falls back down (this will feel wrong, but trust me). After the cookies puff up again in 2 minutes, repeat lifting and dropping the pan. Repeat a few more times to create ridges around the edge of the cookie. Bake 16 to 18 minutes total, until the cookies have spread out and the edges are golden brown but the centers are much lighter and not fully cooked.

chocolate-chip-cookies-the-vanilla-bean-baking-book5-of-7

Transfer the baking sheet to a wire rack; let cool completely before removing the cookies from the pan.

chocolate-chip-cookies-the-vanilla-bean-baking-book3-of-7

NOTES: These cookies are rather large, but to get the edges to spread out and crinkle, they need to be on the big side. If you want to make the cookies smaller, you won’t get as many ridges on the outer layer, and your center won’t be quite as gooey. They will still be delicious, but not quite what I intended for you.

chocolate-chip-cookies-the-vanilla-bean-baking-book2-of-7

If you skip freezing the cookies, they will spread too much on the pan and will not form the crinkly outer layer.

chocolate-chip-cookies-the-vanilla-bean-baking-book1-of-1

I’ve made several recipes from Sarah’s book and they are now staples in my kitchen. It is a great book for both beginners and more advanced bakers. You’ll want to start with these cookies, but then quickly make her chocolate cake. I am known for my chocolate cake and I now use Sarah’s.


The post Chocolate Chip Cookies from The Vanilla Bean Baking Book appeared first on Artisan Bread in Five Minutes a Day.

The Best Granola, Ever!

$
0
0

This is one of my favorite recipes in The New Artisan Bread in Five Minutes a Day and it isn’t a bread at all. There is really nothing that smells as good as this granola when it is baking. It tastes incredible and makes a fabulous breakfast, snack or gift. It is one of those recipes you will end up baking over and over again.

I developed the recipe for the book to use in the “Aunt Melissa’s Granola Bread” on page 114. My Aunt lived with my father and me on a commune in the Northeast Kingdom of Vermont. She baked this granola at least once a week in massive batches to feed the many people who lived with us. It was so popular she ended up selling it to the local co-ops and then beyond. Our commune became all about granola production and I still to this day, over 45 years later, remember the smell of it baking.

My aunt passed away many years ago and the actual recipe with her. This one is very close and brings back all of the wonderful memories of that time and of her. I hope you enjoy it as much as my family does!

Aunt Melissa’s Granola (this is how it appears in the book, but I usually double the amount):

1/3 cup honey (if you are using a honey that has crystallized, just melt it for a few seconds)

1/4 cup maple syrup

1 to 2 tablespoons molasses (optional)

1/3 cup canola oil

2 tablespoons water

1/2 teaspoon pure vanilla extract

1/4 teaspoon ground cinnamon

1/4 teaspoon salt

4 cups rolled oats

1/4 cup sesame seeds (you can also use flax, poppy, chia, or any of your choice)

1/2 cup raw sunflower seeds (pumpkin seeds are also lovley)

3/4 cup chopped nuts of your choice

3/4 cup shredded unsweetened coconut (I’ve used sweetened in a pinch and it is quite good, but makes a much sweeter granola)

1/2 cup raisins (I usually end up doubling the amount)

1/2 cup dried cherries, chopped dried apricots and/or dried cranberries (use any combination of dried fruit that you enjoy and as much of it as you like!)

Preheat oven to 350° and line 2 rimmed baking sheets with parchment or a silpat

granola

Combine the honey, maple syrup, oil, water and vanilla, set aside.

Toss together all of the dry ingredients. (leaving the raisins and dried fruit out until after the granola is baked)

granola

Add the honey mixture and toss with a spoon until the oats are well covered.

granola

Spread the granola over two rimmed baking sheets in a thin layer.

granola

Bake for 25-30 minutes. After 10 minutes toss the granola with a spoon and rotate the trays from top to bottom so they both bake evenly. keep a close eye on it as it starts to turn brown so it doesn’t over bake. It will be a deep golden brown when it is done.

Allow the  granola to cool on cooling rack and then put in a large bowl and add the dried fruit.

granola

Eat as a breakfast cereal, give as gifts in glass jars and make it into our “Aunt Melissa’s Granola Bread” on page 114 of The New Artisan Bread in Five Minutes a Day. Enjoy!

The post The Best Granola, Ever! appeared first on Artisan Bread in Five Minutes a Day.

Chocolate Bread… Yes, chocolate!

$
0
0

chocolate bread

As you all know by now, at BreadIn5 we take our sweets very seriously and chocolate is an essential food group. So we wanted to share one of the great pleasures of The New Artisan Bread in Five: Chocolate Bread. It has an intense chocolate flavor without being too sweet. This bread is equally as good with a sweet cherry jam as it is with a sharp cheddar; it all just depends on your mood. There will rarely be leftovers (but just in case there are we’ve also got a recipe for Chocolate Cherry Bread Pudding, page 362 of The New Artisan Bread in Five Minutes a Day, that is out of this world!)

chocolate bread

The chocolate dough is just a list of ingredients that gets dumped in a bucketthis is no different from any other recipe in the book, just a bit more on the list. This dough is unlike any other in the book as it has no stretch to it, due to all the chocolate.

Chocolate Bread from The New Artisan Bread in Five Minutes a Day, (Chocolate Chocolate-Chip Bread, on page 332).

2 1/2 cups lukewarm water

3/4 cup vegetable oil

1 tablespoon granulated yeast

1 tablespoon Kosher salt

1 cup granulated sugar

5 1/2 cups unbleached all-purpose flour

3/4 cup unsweetened cocoa powder – (natural or Dutch processed will work)

1 1/2 cups bittersweet or semisweet chocolate chips

Butter for greasing the pan

Sugar for greasing the pan and sprinkling on top of the loaf

To make the dough:

Dump the water, vegetable oil, yeast, salt, and sugar in the bucket and give a half-hearted stir. Dump in the flour, cocoa powder, and chocolate chips. Mix the dough together until there are no lumps of dry flour. Cover the bucket with a not airtight lid and allow to rest for about 2 hours on the counter.

You can use the dough immediately after rising and it is quite luxurious, but for this demo I wanted to show you how to deal with the chilled dough. So I stuck the dough in the refrigerator for 12 hours.

Grease your Loaf Pan (8 x 4-inch, or a 8 x 4 x 4-inch Pullman pan) and then sprinkle it with sugar. This extra step of sugaring is not essential, but it helps the loaf pop out of the pan. I prefer it to flour for chocolate breads because you don’t end up with the chalky look on the outside of your loaf.

Once the dough is chilled, reach in the bucket to grab the dough. You will be met with a very stiff dough that has no stretch, due to all the chocolate in the dough, not because your dough is too dry. Shape the dough into a round, and let it rest for a few minutes. Flatten the dough into a rectangle.

(A reader left a comment about forming two balls to create a loaf bread, they found it easier to work with. I thought for this dough it would also be a great idea, because you are just pressing it into shape instead of stretching it into a smooth ball. If you would like to try this method, take the 2 pounds of the dough from the bucket, divide it into two equal pieces and press them into smooth balls, then place them next to each other in the prepared pan. Thank you TS for the suggestion, I think it worked beautifully!)

Place the dough into the prepared pan, cover loosely with plastic wrap and allow to rest for 1 hour and 45 minutes (up to 2 hours and 30 minutes if your kitchen is particularly cool).

Adjust an oven rack to the middle position and preheat your oven to 350F.

The dough will rise a bit, but not a tremendous amount (this is true of all our dough). Sprinkle with sugar and bake in the center of the oven for 45-50 minutes, or when the bread registers 190-200F.

Remove from oven and take the bread out of the pan to cool completely.

chocolate bread

Enjoy with preserves, marmalade or a slice of sharp cheddar!

The post Chocolate Bread… Yes, chocolate! appeared first on Artisan Bread in Five Minutes a Day.


Hot Cross Buns for Easter!

$
0
0

Hot Cross Buns

Hot cross buns, hot cross buns, everybody loves hot cross buns! are the words to the children’s song, and they hold true even now. These little buns are traditionally served at Easter time: A sweet dough that is spiced, studded with dried (sometimes candied) fruit and decorated with a cross made of icing. I made them after many requests and my kids devoured them within minutes; they were nervous about the raisins, but the cream cheese crosses and scent of cinnamon and nutmeg drew them in.

As I researched these delicious buns I realized that there are just as many ways to make them as there are families who bake them. Some people slash the dough to make the cross, others use a flour and water paste to create the symbol and others use the sweet icing. Tell me how you make your buns, and if you don’t have a family tradition yet, you can start with these!

If you follow along on our Breadin5 Instagram, you can watch us make the buns in our Instagram stories. The recipe comes from our latest book, Holiday and Celebration Bread in Five Minutes a Day, which also has a whole chapter on Easter bread recipes.

Hot Cross Buns

Hot Cross Buns

Hot Cross Buns
From Holiday and Celebration Bread in Five Minutes a Day

Follow along in our Instagram stories to see how we make the buns!

Dough (yields 5.7 pounds, about 25 buns)
1 ½ cups (340g) lukewarm water (100F or below)
1 tablespoon (10g) Red Star Platinum Yeast

1 tablespoon (17g) kosher salt
8 large eggs (455g), lightly beaten
½ cup (170g) honey
1 ½ cup (3 sticks | 340g) unsalted butter, melted
7 ½ cups (1065g) all-purpose flour
2 teaspoon ground cinnamon
1 teaspoon freshly grated nutmeg
1 teaspoon ground allspice
2 teaspoons orange zest, grated
2 teaspoons pure vanilla extract
1 ½ cups (200g) currants or raisins

Egg wash (1 yolk with 1 tablespoon water), for brushing buns

Icing
4 ounces (113g) cream cheese, room temperature
4 tablespoons (57g) unsalted butter, room temperature
½ cup (57g) confectioners’ sugar
¼ cup (85g) maple syrup

Hot Cross Buns

Mixing and storing the dough: Mix the water, yeast, salt, eggs, honey, and melted butter in a 6-quart bowl, lidded (not airtight) food container, or the bowl of a stand mixer.

Mix in the flour, spices, zest, vanilla, and raisins without kneading, using a spoon or heavy-duty stand mixer (with paddle). If you’re not using a machine, you may need to use wet hands to incorporate the last bit of flour. The dough will be loose but will firm up when chilled; don’t try to work with it before chilling.

Cover (not airtight), and allow to rest at room temperature for 2 hours, then refrigerate.

The dough can be used as soon as it’s thoroughly chilled, at least 3 hours. Refrigerate the container and use over the next 5 days.

On baking day: dust the surface of the refrigerated dough with flour and cut off a 2-pound (cantaloupe-sized) piece. Divide the dough into 8 or 9 equal pieces and quickly shape into balls.

Place 2 inches apart on a baking sheet lined with parchment paper or silicone mat, cover loosely with plastic wrap and allow to rest at room temperature for about 45 minutes.

Preheat the oven to 350F, with a rack placed in the center of the oven.

Brush the tops with the egg wash and place the baking sheet in the oven. Bake for about 25 minutes, or until richly browned.

Allow to cool completely. Pipe the icing in a cross over the top of each bun. There will be some extra icing for spreading on the buns.

Hot Cross Buns

The post Hot Cross Buns for Easter! appeared first on Artisan Bread in Five Minutes a Day.

Broa (Portuguese corn bread) with Caldeirada de Peixe (Portuguese fish stew)

$
0
0

broa.jpg

I may have made a resolution about not complaining about the weather this year, but too bad!  Greetings from Minnesota, where I’m freezing at my desk, so today’s a soup and bread day.  In the book, we included a Portuguese Corn Bread (Broa) and an accompanying Portuguese Fish Stew (Caldeirada de Peixe) to go with it–it’s a perfect combination.

The Broa dough is simply our Master Recipe, substituting 1 1/2 cups of cornmeal (yellow or white, stone-ground or regular) for 1 1/2 cups of unbleached all-purpose flour.  Bake as usual as a round loaf.  In the picture above I used a lightly greased and stove-top pre-heated black cast-iron skillet (my skillet doesn’t come with a cover or I’d have tried that, see Zoe’s post about baking in covered cast-iron).  Amazon carries the Lodge brand (click here to view).   Here’s the Caldierada de Peixe recipe:

Portuguese Fish Stew (Caldeirada de Peixe)

The distinguishing character of this soup comes from the orange zest and hot pepper, which makes it quite different from French or Italian versions. Cod is a typical Portuguese choice to include, but the dish works well with any combination of boneless white-fleshed, non-oily fish, and/or shellfish.

Makes 6 to 8 servings

1/4 cup olive oil
1 large onion, chopped
2 leeks, washed to remove interior soil and coarsely chopped
1 bulb fennel, white parts only, coarsely chopped
5 finely chopped garlic cloves
1 cup diced tomatoes, canned or fresh
1 red bell pepper, cored, seeded, and diced
1 bay leaf
Zest of 1 orange
1 quart fish stock or water, or an 8-ounce bottle of clam juice plus 3 cups water
2 cups dry white wine
Scant 1/4 teaspoon hot red pepper flakes
1 tablespoon salt
Freshly ground pepper to taste
3 pounds mixed white, non-oily boneless fish and shellfish, or just fish

1.  Heat the oil in a large stockpot, add the onions and leeks, and sauté in olive oil until softened. Add the fennel and garlic and sauté until aromatic.

2.  Add all the remaining ingredients except the fish and shellfish and bring to a boil. Cover, lower heat, and simmer for 20 minutes.

3.  While the stock is simmering, cut the fish into bite-size portions. Bring the stock back to a rapid boil, add the fish, and cook for 1 minute.

4.  Add the shellfish (if using) and continue to boil until shells open, approximately 1 minute. Shake the pan occasionally to encourage clam and mussel shells to open. If using shrimp, turn off the heat as soon as all the shrimp lose their gray translucency; any longer and they quickly become tough and overcooked. Depending on your pot and burner, this will probably be about 2 to 3 minutes.

5.  Serve hot, with wedges of Broa.

The post Broa (Portuguese corn bread) with Caldeirada de Peixe (Portuguese fish stew) appeared first on Artisan Bread in Five Minutes a Day.


Latest Images